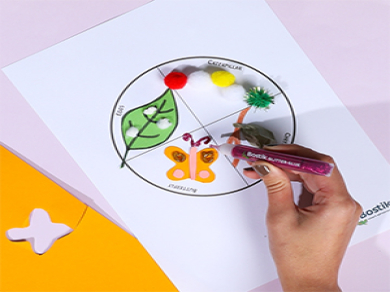
Butterfly Plate Life Cycle

DIY guide on creating a beautiful butterfly plate that captures the wonder of nature! In this tutorial, we'll walk you through crafting a stunning, decorative piece that showcases the life cycle of a butterfly. Using Bostik's high-quality adhesives, you'll be able to design and assemble your plate with ease. Perfect for adding a touch of elegance to your home or as a thoughtful gift, this project combines creativity with educational fun. Let’s dive into this step-by-step guide and bring the magic of butterflies to life!

Instructions

Step 1: Ready Template

Print out the life cycle template from the attached PDF… or draw your own!

Step 2: Make A Leaf

Cut out a small leaf from your green construction paper and draw lines with a black pen.

Step 3: Stage 1

Tear a cotton ball into smaller sections and stick on the leaf to create eggs. Glue your creation onto STAGE 1 of the template.

Step 4: Stage 2

Glue colourful pom poms in a squiggly line on the STAGE 2 section to create your caterpillar.

Step 5: Create Branch

Draw a small twig onto the STAGE 3 section.

Step 6: Stage 3

Cut a 3cm square of tissue paper and twist it at both ends to form the cocoon. Glue onto the twig.

Step 7: Stage 4

Cut out butterfly shape and paste onto STAGE 4 of your template.

Step 8: Create Butterfly

Decorate with glitter glue and create the antennae.

See all products