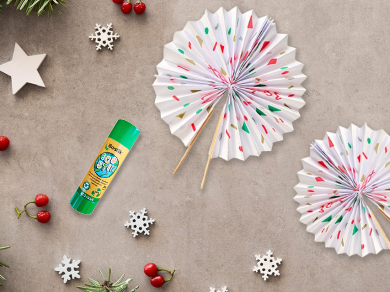
Christmas party fan

Get ready to elevate your Christmas party décor with Bostik's festive DIY Party Fan tutorial! Whether you're hosting a holiday gathering or simply looking to add a touch of seasonal flair to your home, our step-by-step guide will show you how to create stunning party fans that are both eye-catching and easy to make. Using Bostik's premium adhesives, you can personalize each fan with your choice of colors and patterns, ensuring they complement your festive theme perfectly. Let's bring joy and cheer to your celebrations this Christmas—explore our inspiration and start crafting today!

Instructions

STEP 1: GETTING READY

Make sure you have everything you need and find a clean surface to work on.

STEP 2: DECORATING THE FANS 

Decorate the 3 x A4 sheets of paper using the felt tip pens; they can be decorated to suit any theme.

STEP 3: FOLDING

Starting at one end of the shorter side of the A4 paper, fold approximately 1cm crease.

Follow this crease with another one but in the opposite direction. Continue until entire paper is folded.

Repeat for your other A4 sheets of paper.

STEP 4: FOLDING AND GLUING 

Take one end of the folded A4 paper and pinch together the creases.

Grab and pinch the other end of that A4 paper. Bring the two pinched ends together and fold down.

Take your Bostik Eco Stik and glue together the sides of the 2 pinched ends.

Repeat this step for the 2 other folded A4 papers to form 3 mini fans. 

STEP 5: GLUING TOGETHER  

Each mini fan has 2 straight sides. Glue one side of 1 mini fan to another side on another mini fan. Then glue 1 side of this fan to the side of the last mini fan.

It will form 1 large fan with 2 straight sides. 

STEP 6: FINAL TOUCHES

Glue the pop stick 1/2 way down 1 straight side of the large fan. Be sure to glue only 1/2 the pop stick leaving the other half to hang. Repeat this for the other side using the other pop stick. 

See all products